
Is the storm season just around the corner? Then it’s about time to do a proper tune up of your generator. If you manage to do this before the storm season begins, you will make sure that your machine will serve as a reliable backup energy source once you really need it.
Another perfect time to do a proper tune up is in Fall, before really cold weather arrives.
Just dig your generator out of garage, pull off that dusty cover and get ready to spend some time on a basic preventive maintenance. Trust me, once that storm hits and your power goes off, you will be glad that you have a reliable energy backup.
Thanks to our easy-to-follow guide, you will be done in an hour and a half at maximum. Our team here at Generatorist has helped over 600,000 visitors find information about generators and we will help you as well. Let’s begin.
Generator tune up checklist
- Clean whole unit from dirt & oil
- Change old oil for new
- Replace old oil filter
- Clean & inspect air filter
- Replace old spark plug
Layman´s Guide
Before we show you individual steps of the whole process of tuning up your generator, you need to read your Owner’s Manual or User Guide carefully.
There is information and recommendations you should always follow, no matter what others say.
We have a list of the most common generators with links to manuals included in a post about choosing the best spark plug, feel free to check it out.
Clean the Whole Unit
Before you decide to do anything, you need to take your time to clean your generator. First, make sure to get rid of any dirt and debris that is either on the wheels or on the body/plastic covers of your machine. It’s best to use a soft bristle brush.
Don’t forget to look under those plastic covers. From our experience, a lot of dirt and leaves are hiding there as well.
Did you know that one of the most common causes of damaged generators is the debris that finds its way into an alternator?
Once you have removed all the dirt, you need to grab cleaning cloth and a degreaser to clean any old and dried up oil on the body of your engine. It’s important to do so as it may get into your engine as you will be replacing your spark plugs.
Also, if everything is clean, you may easily locate any potential oil leak.
A generator that is cleaned on a regular basis will serve you for a longer time without experiencing any issues as there will be less dirt, dust, and debris that could get sucked into your air filter and clog it.
CHANGE OLD OIL & OIL FILTER
Do you want to make your generator run as smooth as when you first bought it? Then you need to regularly replace the old engine oil with a new one to make sure everything is properly lubricated.
You can do this easily thanks to our easy-to-follow guide:
- Get your Owner´s manual and carefully read instructions
- Run your generator for a couple of minutes outside to heat up the old oil (it will flow more easily)
- Open the oil fill cap
- Remove the oil drain plug (if your machine has one)
- Drain the old oil into appropriate canister
- Remove the old oil filter (if your generator has one)
- Replace the old oil filter with a new one (don’t forget to lube up its rubber O-ring)
- Clean and reinstall the oil drain plug
- Add recommended type and amount of new oil (see your Owner’s manual for more info)
- Clean and reinstall the oil fill cap
Just keep in mind that this is a short summary of steps you need to take and that there are many possibilities to injure yourself or damage your generator during the process.
That is why we have published a much more detailed guide on how to change old oil in your generator.
If you need more guidance on this, then we highly recommend you to check it out.
REPLACE THE OLD SPARK PLUG
Is your generator clean and has fresh engine oil in it? Then it’s the perfect time for you to inspect and replace the spark plug. Keeping it in a good shape will result in shorter starting time of your generator.
All you need to do is to follow these simple steps:
- Make sure your generator is turned off
- Remove protective casing and locate your spark plug (your Owner´s manual will provide more info on this)
- Grab the spark plug boot and disconnect the spark plug wire (gently twist and pull)
- Clean the area around the spark plug so nothing will be able to get into your engine once you remove it
- Use ratchet with the right socket to make the spark plug loose
- Unscrew the rest of threads manually by your hand
- Remove the old plug and check the gap on the new one (see your Owner’s manual for the right gap and model)
- If the gap is correct, reinstall your spark plug (do the threading by your hand)
- Once you reach the end, gently tighten the new plug by the ratchet (don’t overdo it)
- Reconnect the spark plug boot
- Reinstall any protective covers you have removed
Again, this is just a short summary of steps to replacing your spark plug. There are several possibilities to damage your generator during the process.
That is why we have written a much more detailed guide about changing the spark plugs here.
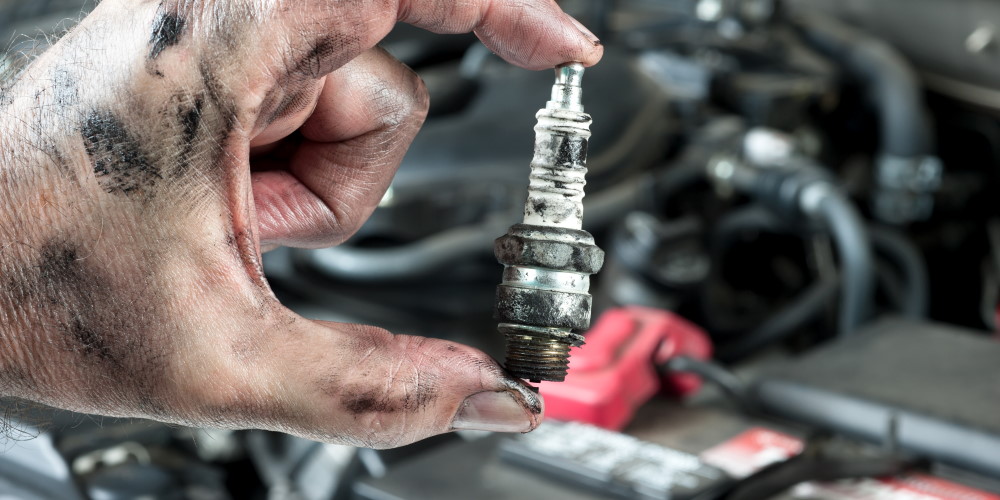
Also, don’t throw the old spark plug away.
Clean it, inspect it, and check if the plug has the correct gap. As long as it seems to be in a good shape, you can store it as an emergency spare part if you can’t get your hands on a new one.
Although we always recommend to use only new spare parts in your generator, even the used ones are better than none in the case of emergency.
INSPECT & CLEAN AIR FILTER
Lastly, while tuning up your generator you also need to inspect and clean the air filter. Don’t worry as this is the easiest step that anyone will be able to do.
Just follow these instructions:
- Unplug the spark plug wire to avoid accidental start up of your generator
- Locate the air-filter housing (you will find info in the Owner’s Manual)
- Clean any dirt, debris or grease you may find on the housing or all around it
- Open the housing and remove air filter (or filters if there are more than one)
- Clean the housing from the inside as well
- Inspect air filters for any signs of holes or excessive compression
- If your air filter has holes in it or is too compressed in some places, get a new one
- If it seems okay, you need to clean it
- If you have a paper filter, just dust it off
- If you have a foam filter, then you need to place it in a solution of warm water and household detergent
- Let it soak and then rinse the excess water (repeat these steps until the water coming from the filter is clean)
- Then let it dry out
- Once dried, you need to pour air filter oil onto it (we like to use the Twin Air brand) and distribute it evenly (get rid of excess oil)
- You need to apply oil on the new foam air filter as it’s the oil that helps to catch even the tiniest particles of dirt and dust
- Reinstall the filter and close the air filter housing
- Reconnect the spark plug wire and reinstall any casings you had to remove as well
This is just a brief overview of steps you need to take. To learn more, read our detailed guide on changing air filter in any portable generator.
Extra tips
You have changed your old oil, oil filter, replaced your spark plug and cleaned your air filter? If you have already done all this and your unit is clean, you can also try these extra tips.
Inspect your machine
Once you have cleaned your unit and have done the tune up, you need to inspect your generator. Take your time to look for anything that seems out of ordinary.
Actually, you should look for:
- Loose or frayed wires
- Rusty, corroded, or damaged parts
- Loose or missing bolts
Doing a detailed examination of your generator may help you discover problematic parts that could cause serious issues sooner or later.
If you discover these in advance, you will have more time to get your generator fixed before the storm season comes.
Start your generator
If everything looks good after you are done with the tune up and inspection, then you should try to start your generator to see if it works well. Keep focusing on these aspects:
- Does it start easily?
- Does it run smoothly?
- Does your generator produce any weird noises or vibrations?
If you have done everything correctly, then your machine should run smoother, produce less vibrations and noise, and start much more easily.
Let it run for 10-15 minutes to make sure everything works as it should.
Store it properly
You have started your generator and found out that everything is perfect? Then you need to properly store your unit in a safe place. The best choice is to store it in a dry, sheltered, clean place that is far away from any source of sparks or fire.
However, before you can leave your generator in such a place, you need to:
- Remove the remaining gasoline
- Burn out the rest of your fuel in carburetor
- Add oil to the spark plug holes
Removing gasoline is best done outside to avoid the buildup of combustible gasoline vapors. First, you need to manually pump out gasoline from the fuel tank into an appropriate canister.
Once done, you need to start your machine (also do this outside to avoid carbon monoxide poisoning) and let it run until it stops from the lack of fuel.
This way you should burn off any remaining fuel that may be inside the lines or carburetor. Doing this will prevent their clogging.
Obviously, if you don’t want to do all of this, you can just add a fuel stabilizer into the tank and leave the fuel there over a longer period of time.
Once you have done everything from the list above, you can put your generator away and cover it to avoid getting dust and dirt into (and onto) your machine.
If you need more info on how to store your generator, then read our guide here with short & long term storage tips.
Let it run each month
Once you have prepared your generator for the storm season, you shouldn’t leave it sitting in your garage alone.
Actually, you need to give it a regular test run to make sure that everything works well and that the engine purrs like a cat.
The best way to do so is to schedule this test run for the first Saturday in each month.
All you need to do is to take your generator outside (away from any windows and enclosed structures to avoid carbon monoxide poisoning), add fuel, start it and let it run for 10-15 minutes.
Try to plug in at least a couple of small appliances to ensure that everything works as expected. That’s all it takes.
If everything runs smoothly, you can store it back safely until the next scheduled test run or an unexpected emergency.
Although some people think that these “test runs” are unnecessary, only by doing these on a regular basis you will make sure that you can always rely on your generator as an emergency energy source.
Stock up on supplies
Maybe the most important advice we can give you is to stock up on supplies in advance.
When the storm season hits, you need to have enough supplies for simple maintenance and small repairs of your generator as you may have a hard time getting these in the time of crisis.
We always recommend to have at least these items stocked in some dry, dark, and cold place:
- Good supply of engine oil (mind the required viscosity)
- At least a couple of spare spark plugs
- Two spare air filters
- A couple of oil filters (if your generator needs one)
- A dozen of bolts
- A fuel stabilizer
In the best case scenario, you should have a stockpile of fuel to be able to run your generator for at least a couple of days.
Just keep in mind that gasoline can go bad in just couple of months and any fuel, if stored improperly, poses a risk of explosion and fire.
In the end, it is up to you to decide if and how much of fuel and other items you will decide to keep at hand.
Keep maintenance recordS
Our last advice for you is to keep some sort of maintenance records. All it takes is to set aside a notebook where you write down everything you have done with regards to maintaining your generator.
Also, you can keep notes on its performance.
This way, you don’t need to remember all this information. Also, taking written notes on your machine will help other members of your family (or its future owners) to better understand what your generator needs and in what technical state it really is.
You will be surprised how helpful these notes can be while doing the basic troubleshooting.
READ NEXT ON GENERATORIST:
- What Is an Inverter Generator & How Does It Work?
- What Size Generator Do I Need to Run a Refrigerator?
- How to Store Your Portable Generator
- Choosing the Best Spark Plug for Your Generator
- How to Change Spark Plugs on Your Generator
- Choosing the Best Oil for Your Generator
- How to Change Air Filter in Your Generator
About Generatorist

Matthew Gerther
Founder, Generator enthusiast
Our aim here at the Generatorist is to become the No. 1 resource for all things related to generators & your power needs. We have helped over 600,000 visitors with our tips, articles and reviews and we will help you as well.
Our work has been featured in many publications around the world – Yahoo.com, Telegram.com, PaylessPower.com, PopSci.com, TopTenReviews.com, TechRepublic.com, iRV2.com, ThePrepared.com, Renogy.com or ADT Solar. Generators are our passion, and we strive to provide the most reliable & most comprehensive information out there.
recommended readings